

How do I set up Fleetee Check from Manager?
- Manager v3
- Administrator
In short. Settings › Fleetee Check (administrator): what the customer receives and signs at each inspection, the vehicle walk-around (sides to photograph), damage location and carry-over from the previous inspection. Each setting saves when changed.
Fleetee Check is the mobile app for inspections. Its settings are made in Manager, in one place for the whole company. Only the company administrator sets them.
Each setting saves as soon as you change it (“Change saved”). Agents find the new setting in Fleetee Check. Depending on your account, some settings (marked “Experimental”, or the advanced checks) may not appear.
Open Settings › Fleetee Check
The page is laid out in cards: Sending and signing documents, Walk-around, Damage location, Carry-over from the previous inspection, Inspection content.
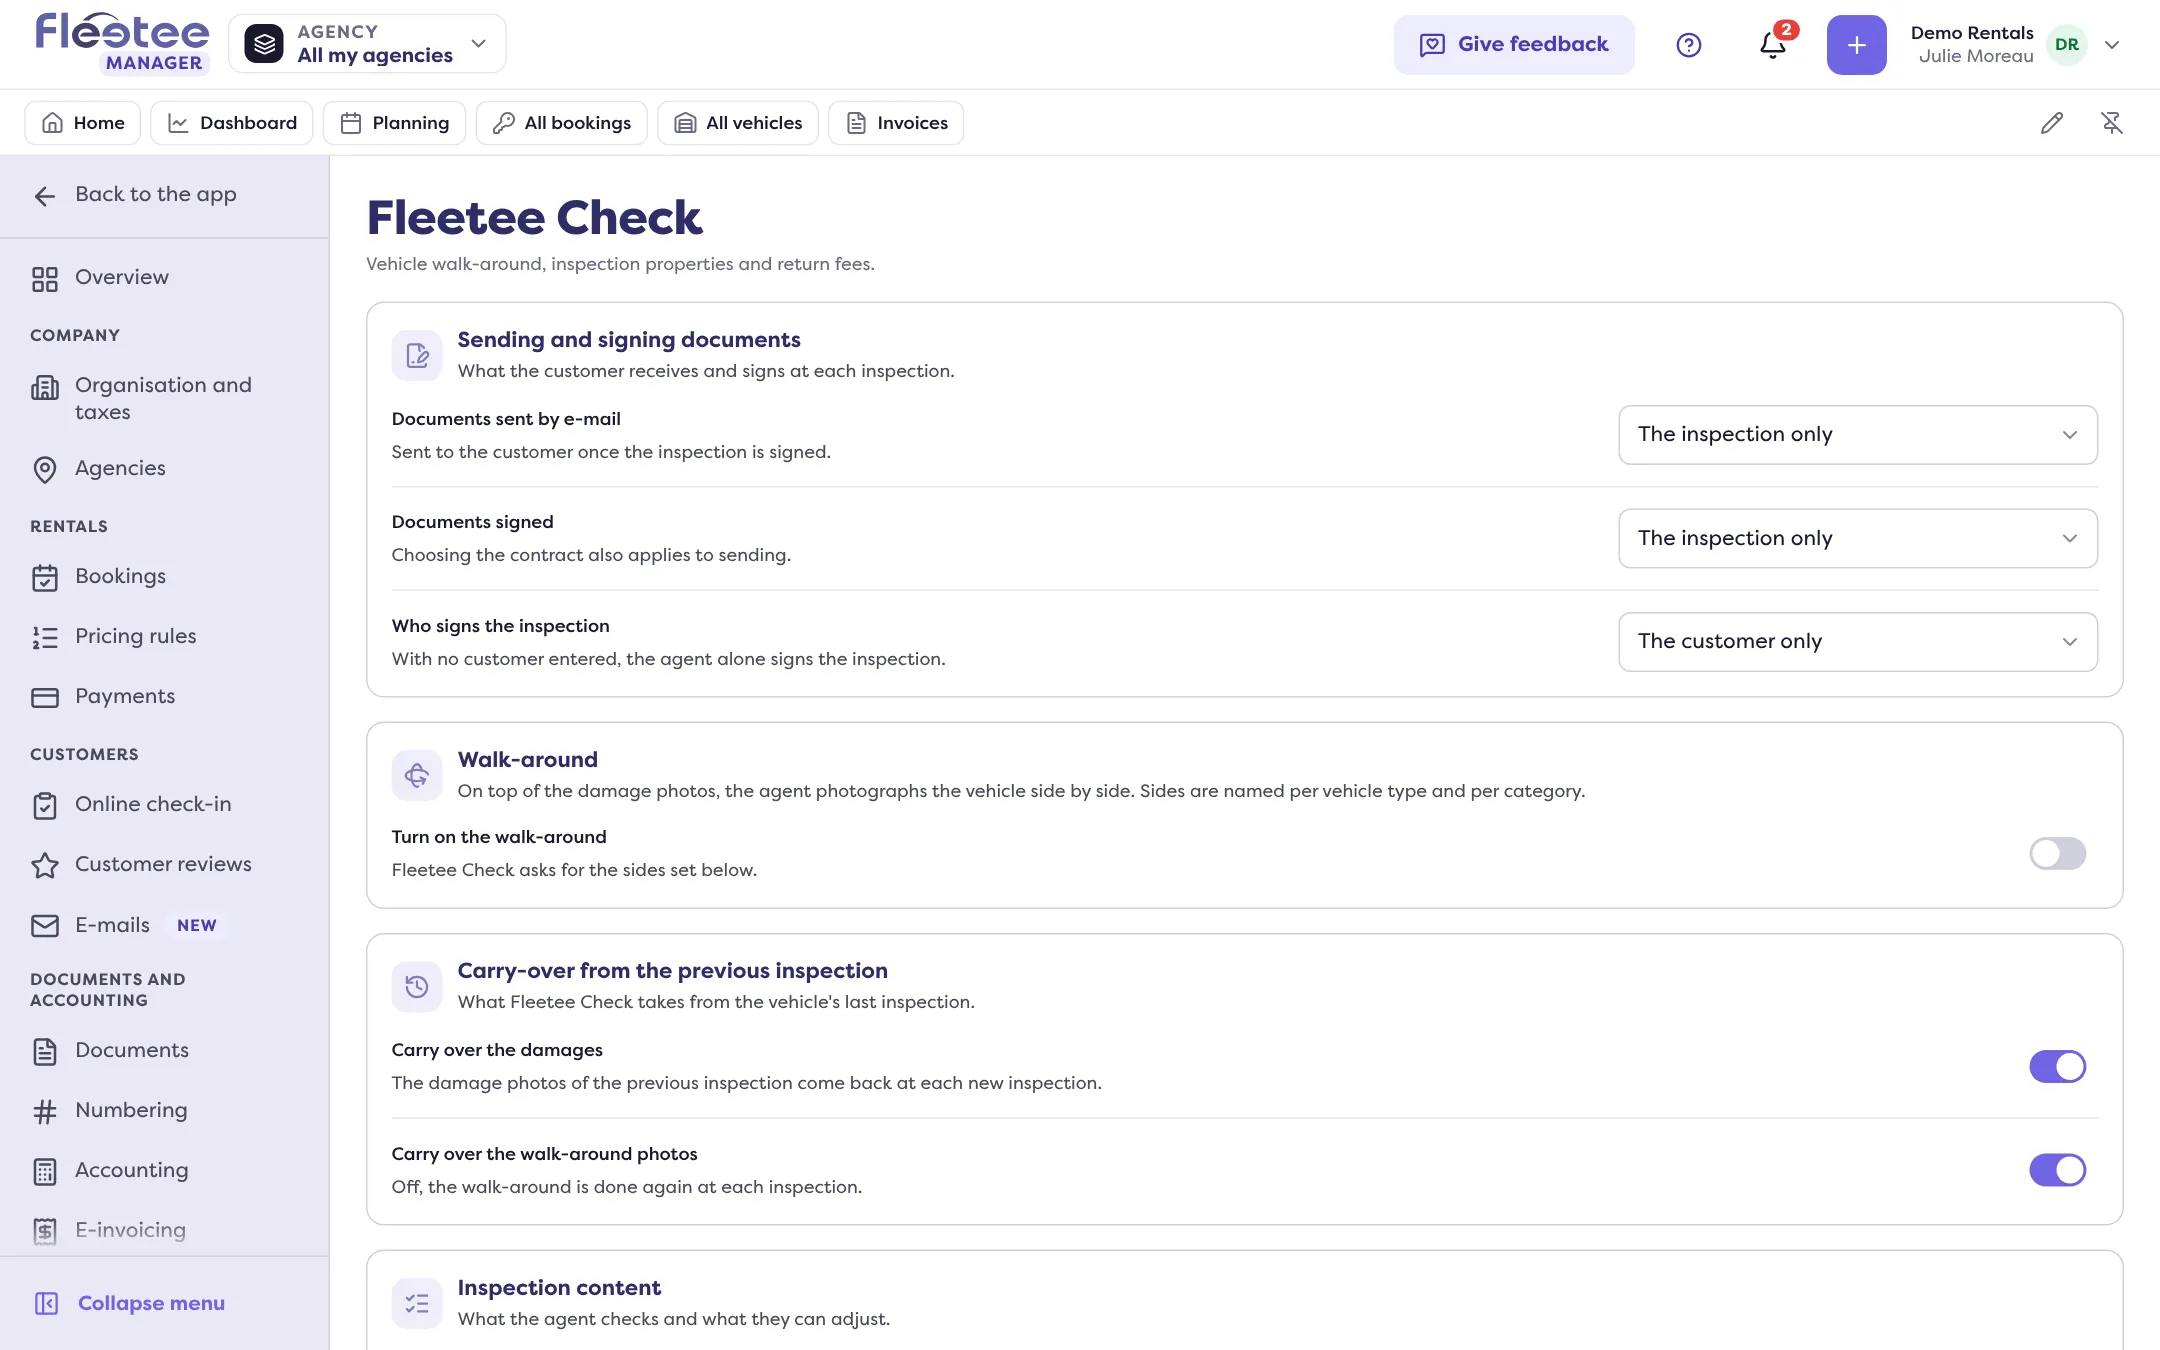
Set the sending and signing of documents
Documents sent by e-mail (once the inspection is signed): The inspection only, The contract and the inspection or Nothing sent after signing. Documents signed: The inspection only or The rental contract and the inspection (this choice also applies to sending). Who signs the inspection: The customer only or The agent and the customer; with no customer entered, the agent alone signs.
Set the walk-around
“Turn on the walk-around”: on top of the damage photos, the agent photographs the vehicle side by side. “Make the walk-around mandatory”: the agent cannot finish a departure or return inspection without the walk-around. Sides are named per vehicle type and per category: “Customise the sides” opens the list (name of each side, in order); “Add the 6 standard sides” offers Front, Front right, Front left, Rear, Rear right, Rear left. A category with no side takes those of its type (“Use the type's sides”). Side names must be unique and non-empty: Fleetee Check matches departure and return by order and name.
Set the damage location
How the agent locates a damage: Same as the type, on the vehicle sides, or on a vehicle diagram. For the diagram, choose a Fleetee illustration (car, van, motorhome, trailer, motorbike, scooter, bicycle, kick scooter, boat) or your image (PNG, JPEG or WebP, 10 MB at most; tip: a top view, the front at the top, on a plain background), then place the damage areas (standard or custom: roof, hull, handlebar…).
Choose what Check carries over
Carry-over from the previous inspection: “Carry over the damages” (the damage photos of the previous inspection come back at each new inspection) and “Carry over the walk-around photos” (off, the walk-around is done again each time).
Choose the content
Inspection content: the properties checked (mileage, fuel, cleanliness and your own fields) are set per vehicle type in Settings › Properties (see How do I add my own fields to vehicles, bookings and customers?). “Adjusting the return fees”: at the return inspection, the agent can adjust the return fees when a limit is exceeded.
After signing
When the inspection is signed and its PDF generated, it is sealed: see Why can’t a signed inspection report be changed any more?. To find the inspections made, see Where can I find an inspection report and its PDF?.
Where to find it: Settings › Fleetee Check
Where to find it: Settings › Fleetee Check
Go further
Updated on 18 November 2026 with version 3.0