

How do I set up online check-in for my customers?
- Manager v3
- Administrator
In short. Settings › Customers › Online check-in: turn the feature on, then set it vehicle type by vehicle type: when the link is sent, information, documents, deposit, digital key, drivers. An agency can have its own settings.
With online check-in, you send your customers a secure link to confirm their details, add their documents and leave their deposit before the rental. What you ask for is set once, per vehicle type.
Open Settings › Customers › Online check-in
Only administrators set everything; an agency manager only sees their agencies.
Turn on “Turn on online check-in”
While the switch is off, only this card shows. To turn it off, Fleetee asks for a confirmation: “No link will be sent to your customers any more. Your settings are kept and come back as soon as you turn it on again.”
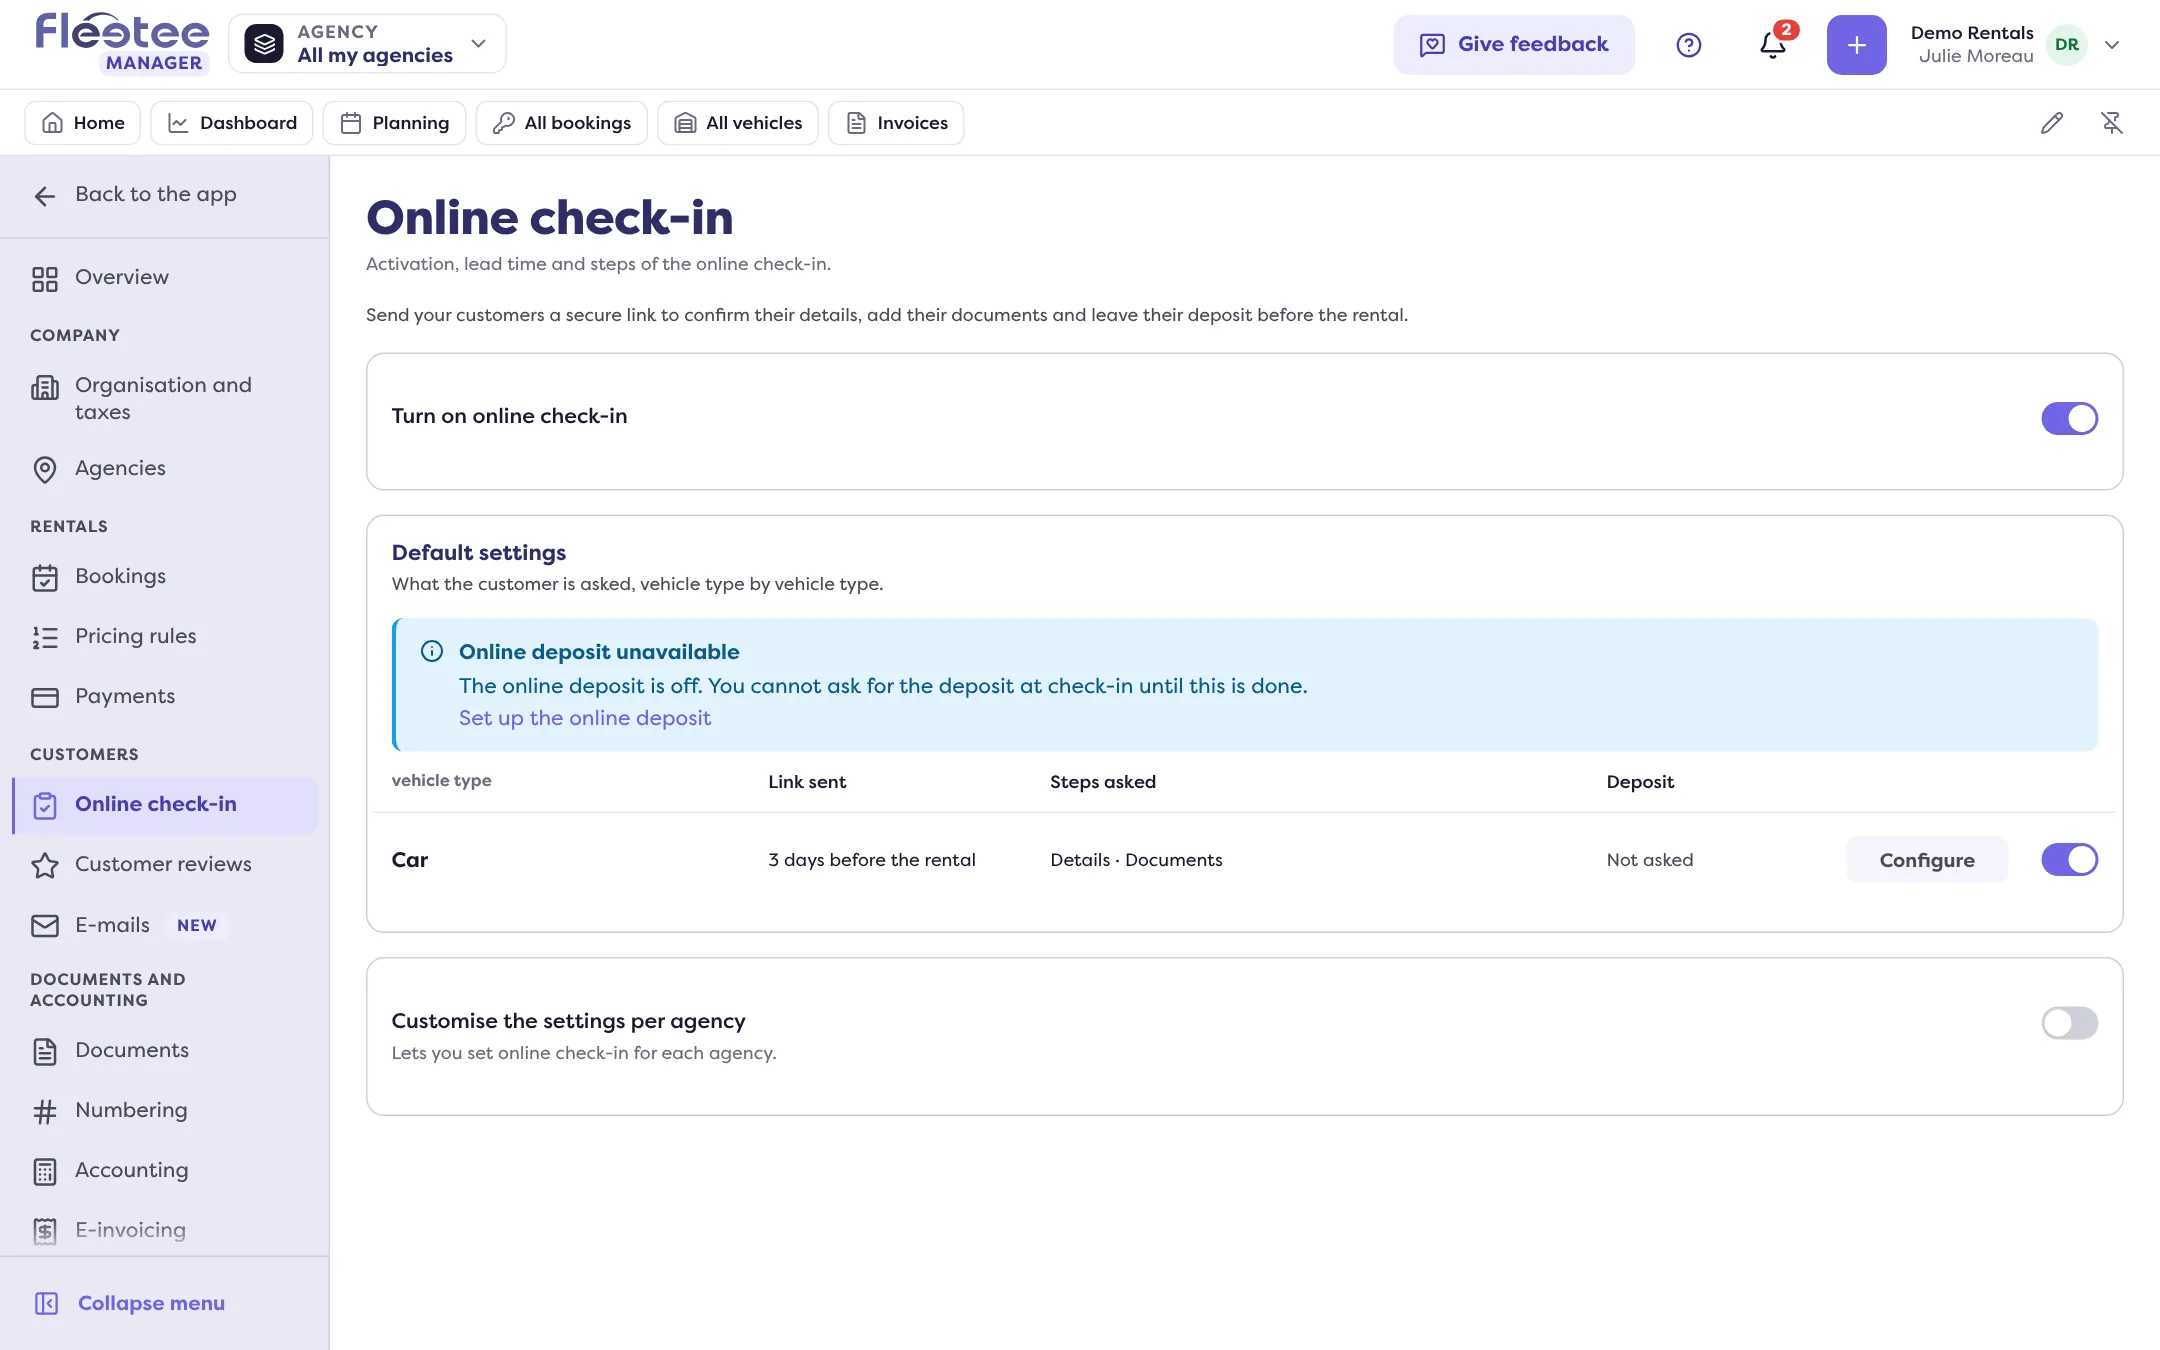
Read the “Default settings”
The table lists your vehicle types with Link sent (“Right after confirmation” or “N days before the rental”), Steps asked (Details, Documents, Deposit, Drivers, or “No steps”), Deposit (Asked or Not asked) and Enabled. The Enabled box turns online check-in off for a single type.
Click “Configure” for a type
A panel opens with an Overview (one switch per step) and one section per setting, described below. Each section opens from the overview or the rail.
Save
If you close the panel with a pending change, Fleetee asks “Discard the changes?”: Cancel, Discard or Save.
The sections of a type
- Delay and emails: Sending the link (“As soon as the rental is confirmed” or a number of days before the rental), the day of the Reminder and the four e-mails: Check-in request, Reminder, Confirmation and Document refusal. You can edit the subject and text of each; left empty, the default template is kept. The “Send e-mails to the customer” switch turns them all off.
- Customer details: what the customer confirms, in this order. For each field: Not asked, Optional or Required. Drag a row to move it, add one of your customer properties with “Add a field”. The e-mail is always required: the link is sent to this address.
- Documents: the documents asked (Driving licence, Passport, Identity card, or a document you create with “Add a document”) and their properties. Document check: Automatic or Manual (you accept or refuse each document).
- Deposit: the “Ask for the deposit at check-in” switch. The amounts are set in Extras › Deductibles and deposits.
- Digital key: what must be validated before the key opens. Each lock is “Blocks the key until it is validated” or “Requested, does not block the key”.
- Additional drivers: “Ask for additional drivers”. Their price is set in your options; a paid option first needs online payment.
The online deposit
The deposit is only asked if the online deposit is set up. Otherwise, a banner says “The deposit is not asked of your customers” or “Online deposit unavailable”, with the cause (no platform chosen, account not connected…), and “Set up the online deposit” takes you to Settings › Payments. The types concerned are marked “Deposit inactive”.
Different settings per agency
The “Customise the settings per agency” switch adds a card per agency. Each agency is Default (it uses the default settings, read-only) or Custom (you set its types as above; changes only apply to it). An agency manager only sees their agencies, and nothing if the company does not customise per agency.
Where to find it: Settings › Customers › Online check-in
Where to find it: Settings › Customers › Online check-in
Go further
Updated on 18 November 2026 with version 3.0